
Step 1
Read Anita in NOA
Check NOA in the Lifepod until the Anita message adds a black box signal to your HUD. That marker is the cleanest route cue for the Digestion Angel Comb and stops the trip from becoming a blind search.
If Subnautica 2 keeps rejecting fish, Oily Salad, coral food, or Halfmoon Jerky, you are missing the Digestion gene. Read Anita in NOA, swim northeast from the Lifepod toward the black box signal, interact with the Angel Comb, then collect Anita black box below the same landmark.
Updated 2026-06-09. Tested in Early Access build 115506.

The search term is usually "can't eat food", but the actual solution is a short Angel Comb trip tied to Anita black box. The important part is the order: get the Anita signal, swim northeast, touch the Angel Comb, confirm Digestion, then grab the black box below it.
Check NOA in the Lifepod until the Anita message adds a black box signal to your HUD. That marker is the cleanest route cue for the Digestion Angel Comb and stops the trip from becoming a blind search.
Leave the Lifepod and hold a northeast line, roughly 15 to 30 degrees on the compass. The target is close enough for starter gear, but do not turn it into sightseeing. Surface when needed, reset your heading, and keep moving toward Anita black box.
The Angel Comb looks like a larger version of the alien adaptation pod from the prologue Pressure Tolerance scene. Aim at the central pod and interact. The short animation unlocks the Digestion gene permanently for that save.
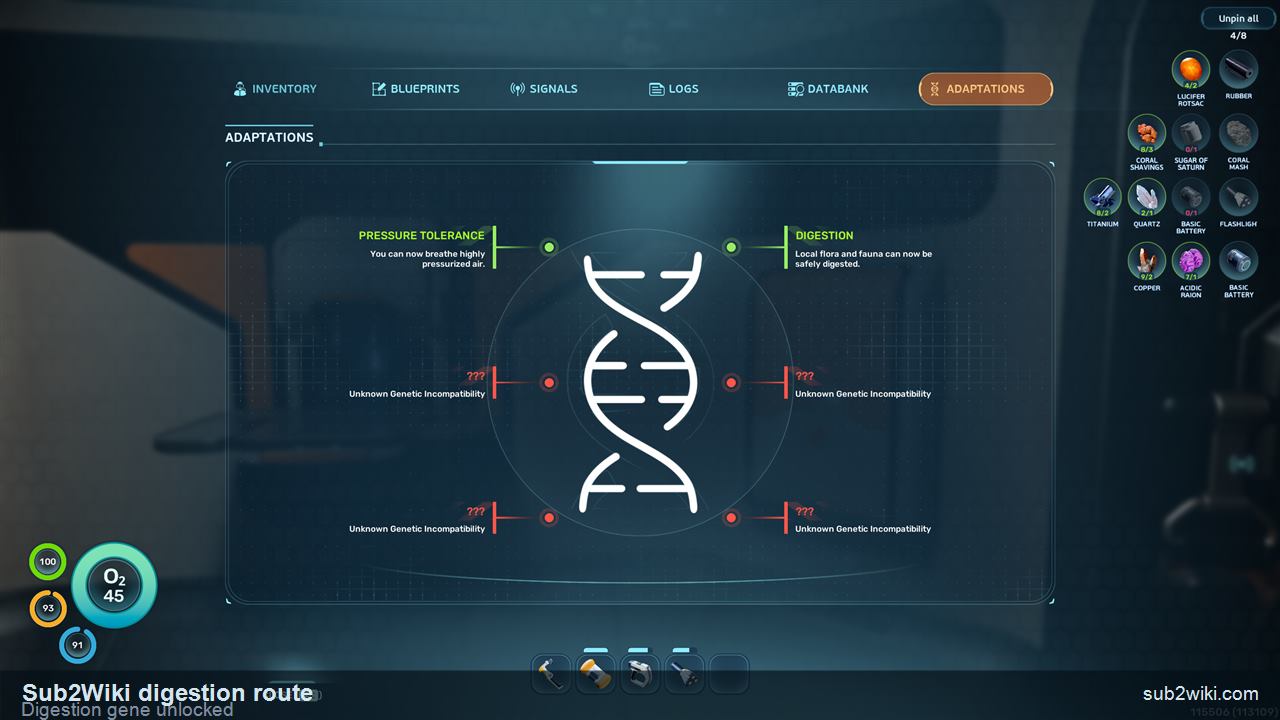
Open the PDA and check Adaptations if you want confirmation. Digestion should now say that local flora and fauna can be safely digested. That is the moment Oily Salad, fish, coral-based food, and preserved fish become useful hunger tools.
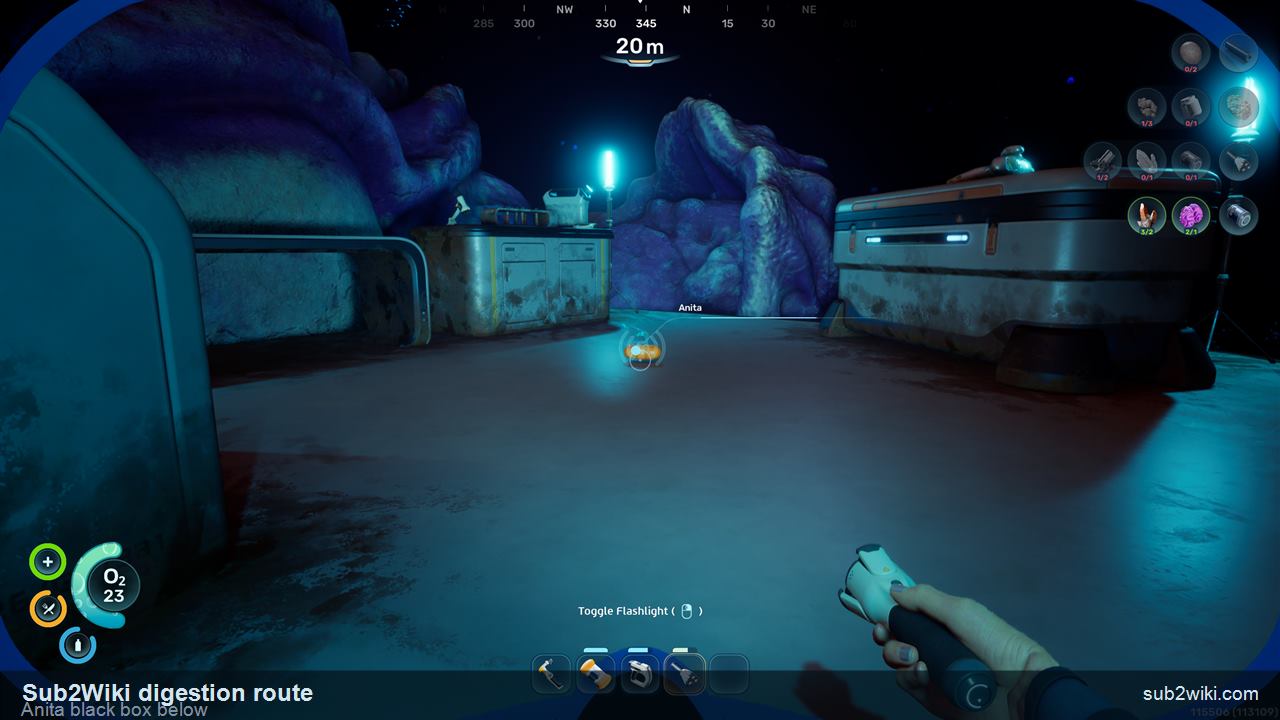
Before you swim home, look below the Angel Comb. Anita black box sits under the same landmark, so this route solves the food problem and moves the colonist trail forward in one trip.
The Angel Comb is not scenery and it is not a normal harvest plant. It is the same kind of biological upgrade system you used near the start of the game to get Pressure Tolerance. This time the result is Digestion, which adapts your character to the local food chain.
That is why the fix feels strange if you approach it like a normal survival-crafting problem. No recipe, tool, or cooked meal replaces the gene unlock. Touch the Angel Comb first, then your food menu starts making sense.
Digestion turns the early menu from misleading into useful. The exact best meal changes with your recipes, but these are the food categories to think about immediately after the Angel Comb.
| Food source | Before Digestion | After Digestion |
|---|---|---|
| Local fish | Catching fish is easy, but Digestive Incompatibility makes them unreliable as food. | Cook them at the Fabricator for a simple early hunger loop. Raw fish are emergency-only compared with cooked meals. |
| Oily Salad | The recipe can appear early, but it stays a trap if your stomach cannot process alien ingredients yet. | A practical plant-food backup once Digestion is active, especially when you do not want to chase fish. |
| Coral and plant-based recipes | Coral and local plant ingredients are not a full answer until the Digestion gene is unlocked. | Coral Mash and similar recipes become real expedition food instead of confusing menu clutter. |
| Halfmoon Jerky | Preserving a fish does not solve the gene problem by itself. | Useful portable food after Digestion, especially when you want hunger coverage away from the Lifepod. |
| Water Slug into Water | Still useful because it handles thirst, not hunger. | Unchanged. Keep using Water Slugs for Water while Digestion opens the hunger side of survival. |
You do not craft the fix. You receive it from the Angel Comb, just like Pressure Tolerance in the prologue.
The clean line is northeast. If the compass is far outside 15 to 30 degrees, reset before you drift past the route.
Digestion is the main reward, but Anita black box is directly below the same landmark. Grab it while you are already there.
The recipe can be available before your character can process it. Save crafted food tests until after Digestion appears in Adaptations.
You start Survival Mode with Digestive Incompatibility. Native food does not become a dependable hunger source until you unlock the Digestion gene from the Angel Comb near Anita black box.
From the Lifepod, read the NOA Anita message, then swim northeast toward Anita black box. The useful compass line is about 15 to 30 degrees, and the Angel Comb is roughly 150 to 170 m away.
No. If you already know the heading, you can swim there early. Reading Anita first is easier because the black box signal marks the same area as the Angel Comb.
Players use both phrases, but the Adaptations menu calls the unlock Digestion. Its practical effect is hunger survival because local food starts working after the gene transfer.
Do not rely on it before Digestion. Oily Salad can show up early in the food loop, but the useful moment is after the Angel Comb unlocks local flora and fauna digestion.
Collect Anita black box below the Angel Comb, then return and build a basic food loop: cooked local fish for quick meals, Oily Salad as a plant-food backup, and Water Slug Water for thirst.
Treat it as a personal survival unlock. Have each player interact with the Angel Comb so nobody is stuck with food that looks edible but fails in their own inventory.
What to do after the food problem is solved:
Starter supplies, Basic Fins, Scanner, Water Slug Water, and early crafting after the prologue.
The wider early-game loop: food, oxygen, scans, storage, and first base decisions.
How Angel Comb gene unlocks fit into long-term progression.
Starter-biome landmarks, scans, shallow resources, and Angel Comb context.
Food, water, crafting recipes, and survival items after the Digestion unlock.
Open the Lifepod-relative marker for the Angel Comb route.