Once you have the Habitat Builder, your first base is short and cheap to set up. This walkthrough follows a real first build, step by step: lay out corridors right next to the Lifepod, seal it with a Hatch, power it with Solar Panels, then add a working Fabricator and labelled storage.
Quick answer. Equip the Habitat Builder (5), right-click for the menu, and place Corridors beside the Lifepod. Add a Hatch (Titanium + Quartz), then two Solar Panels for power. Keep generation above the 2-power baseline. Build a Fabricator (5 Titanium, 1 Copper, 1 Quartz), then Wall Lockers for food and ore.
Updated . Tested in Early Access, hands-on (June 2026).
Base building unlocks with the Habitat Builder. If you do not have it yet, scan both fragments at the Welcome Center and craft it first. For your first base, you only need Titanium, Quartz, and a little Copper, most of which is already around the Lifepod.
The build menu at a glance
Right-clicking the Habitat Builder opens a tabbed menu. Here is what lives in each tab so you know where to find every piece in this guide.
Tab
Key pieces
Note
Standard Elements
Corridor, Hatch, Window
The base shell. Corridors are all you can build at first; Hatch and Window come from Standard Elements too.
Interior Facilities
Fabricator, Biolab, Wall Locker, lights
Indoor systems. Some are default (Wall Locker, lights), others are unlocked earlier, like the Biolab and wall lights from the Welcome Center.
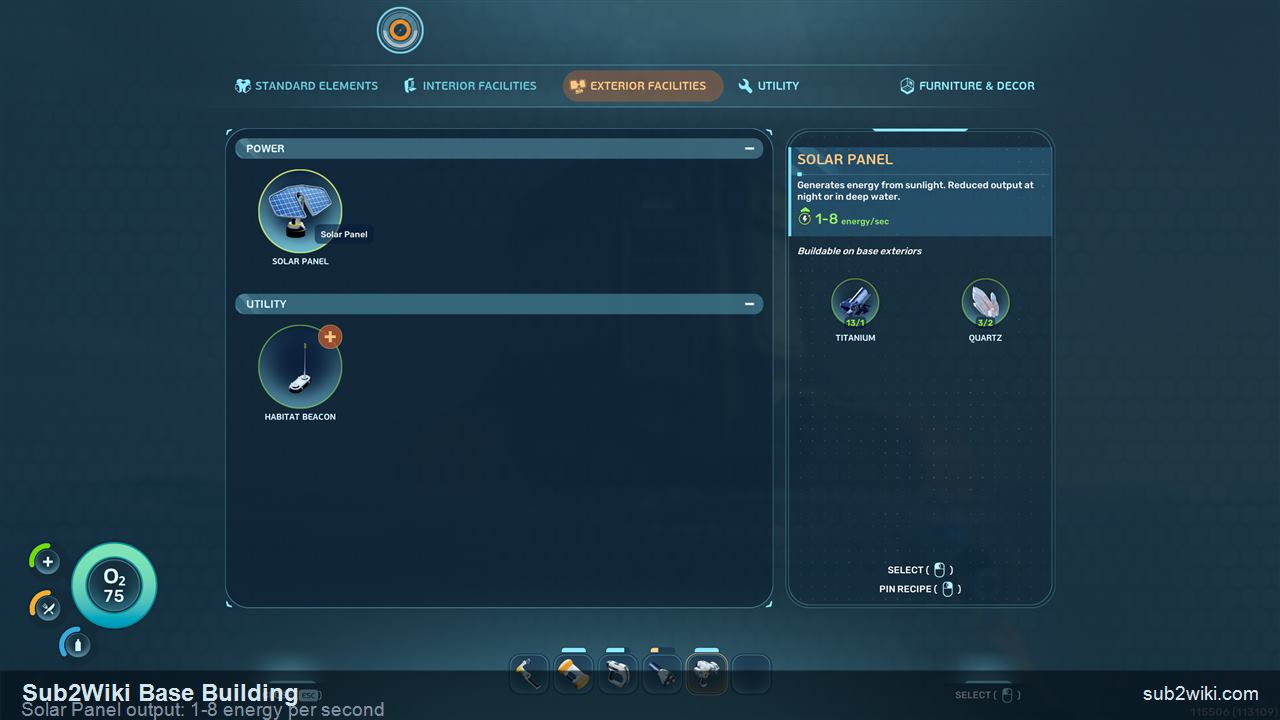
Exterior Facilities
Solar Panel, Habitat Beacon
Outdoor power and markers. The Solar Panel is your first power source; the Beacon marks the base on the map.
Utility
Tools and connectors
Build-support pieces. Check this tab as you unlock more advanced base systems.
Furniture & Decor
Decoration pieces
Cosmetic items, including unlocks like the New Life Poster scanned at the Welcome Center.
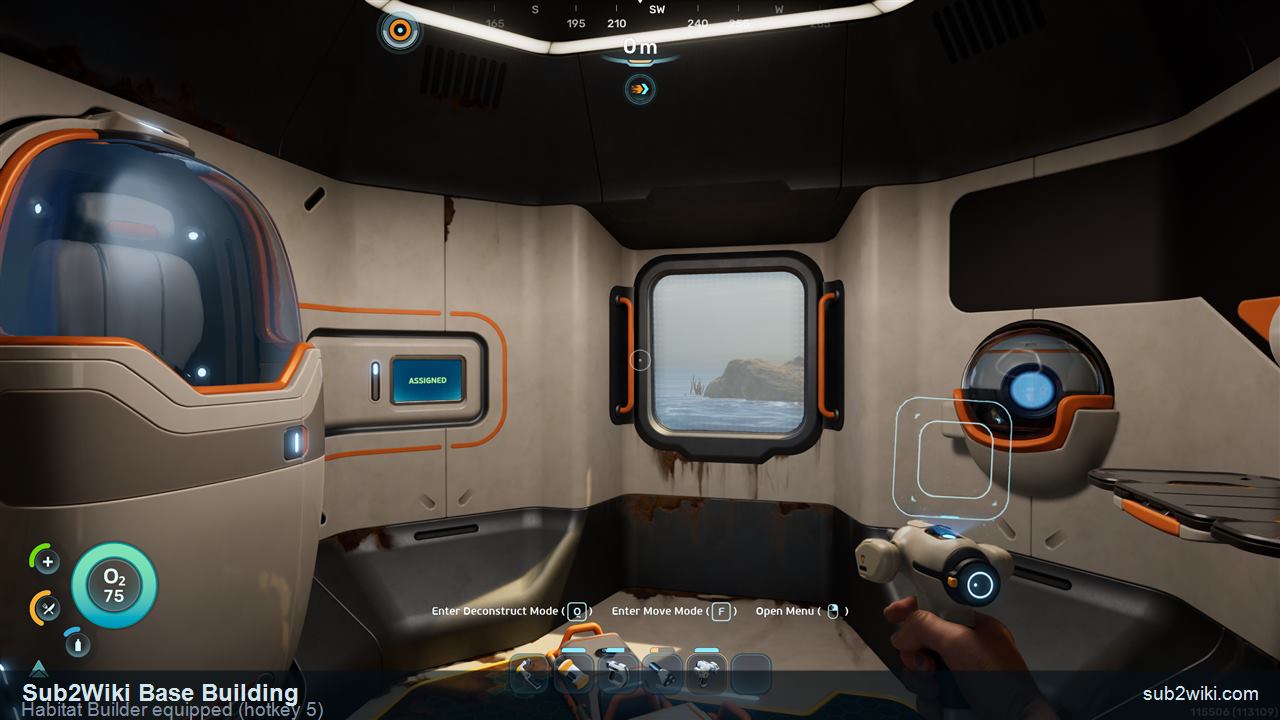
Press 5 to equip the Habitat Builder, then right-click to open its build menu.
Step 1
Equip the Habitat Builder
Select the Habitat Builder on hotkey 5. Holding it shows the Enter Deconstruct Mode, Enter Move Mode (F), and Open Menu prompts at the bottom of the screen. Right-click opens the dedicated build menu where every base piece lives.
Exterior Facilities holds the Solar Panel and Habitat Beacon. Build by the Lifepod and you can skip your own beacon.
Step 2
Build right next to the Lifepod
For a first base, do not swim far. Build right beside the Lifepod. You can pull Titanium straight from the Lifepod, the pod stays free oxygen and backup storage, and you can reuse its beacon instead of placing your own. Shallow water also matters for power, as you will see with the Solar Panel.
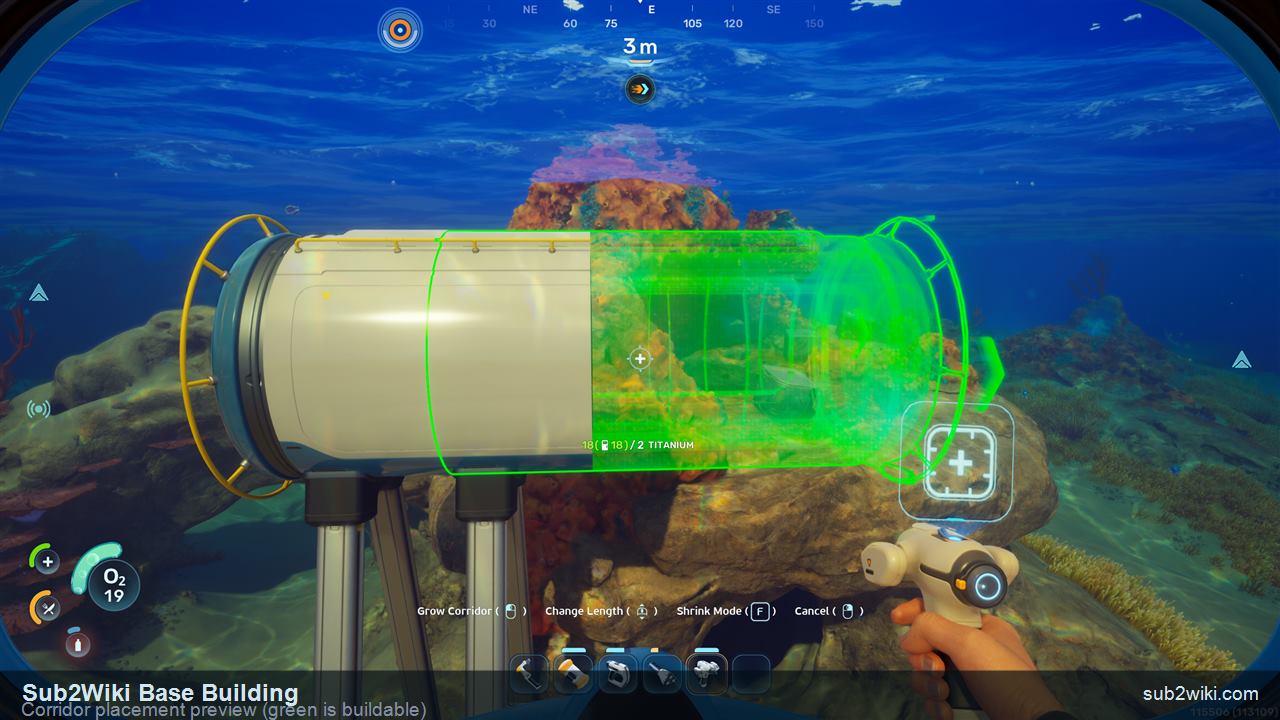
Green means buildable; red means blocked. Mouse wheel rotates the angle.
Step 3
Place corridors first
Early on you can only build Corridors. Rooms unlock later. A green preview means the spot is valid, red means it is blocked. Use the mouse wheel to rotate the corridor angle, hold the build to extend it, and press F for Shrink Mode if it grew too long. Titanium from the Lifepod is enough to lay out the whole skeleton.
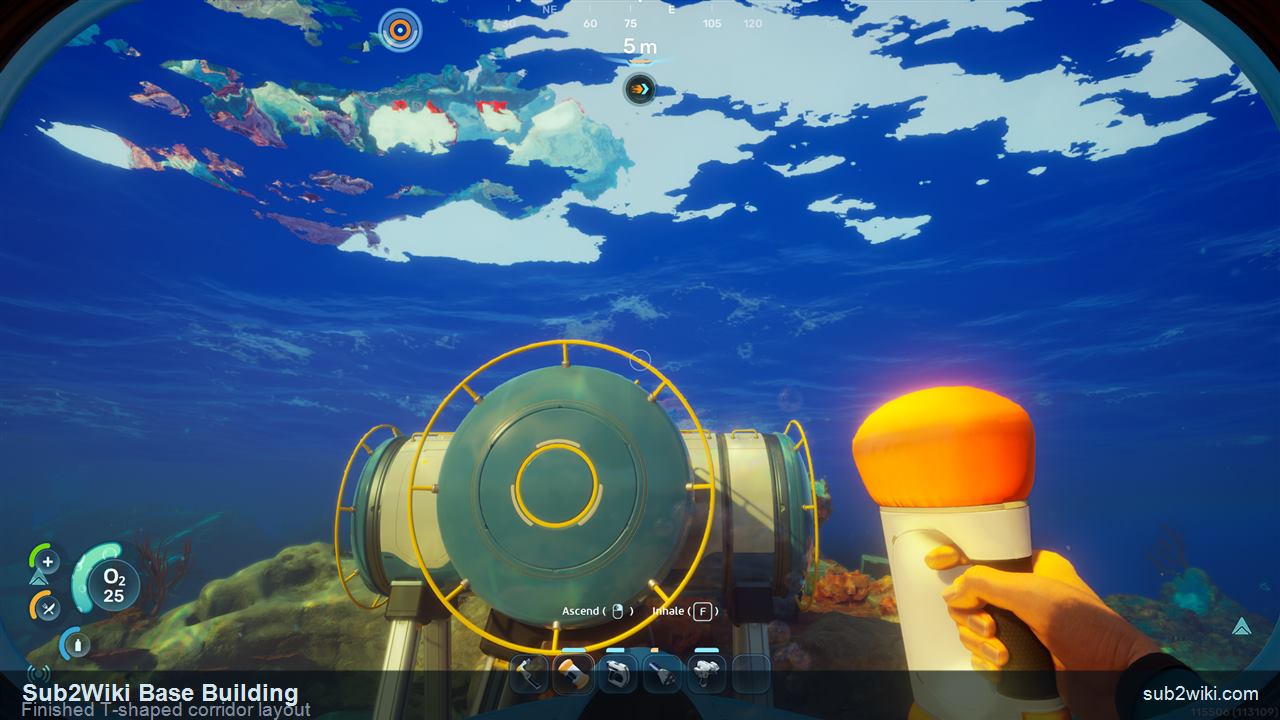
A T-shaped corridor run gives you three ends for hatches, power, and expansion.
Step 4
Settle on a simple layout (T-shape)
A T-shape is a clean first layout: one spine with a branch gives you multiple ends for a hatch, future power pieces, and later expansion, without overbuilding. Keep it compact so power demand stays low while you are still on Solar Panels.
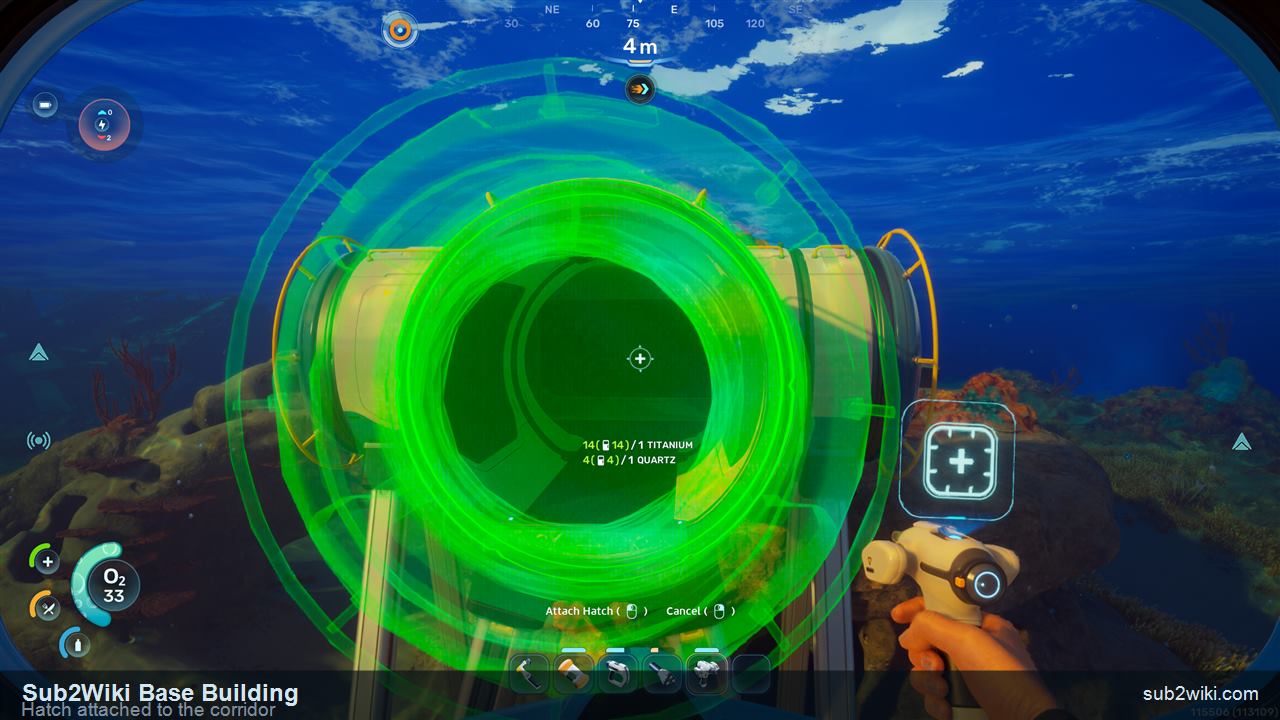
The Hatch is your entry/exit point and needs Titanium plus Quartz.
Step 5
Add a Hatch to get inside
A base is sealed until you add a Hatch. It is your entry and exit point and costs Titanium and Quartz. Place it on a free corridor end where it is easy to reach when you swim home.
With the Hatch attached, the corridor shell is complete and watertight.
Step 6
Confirm the shell is sealed
Once the Hatch is attached, the corridor shell is finished and watertight. Now the base needs power before any interior systems, including oxygen, will run.
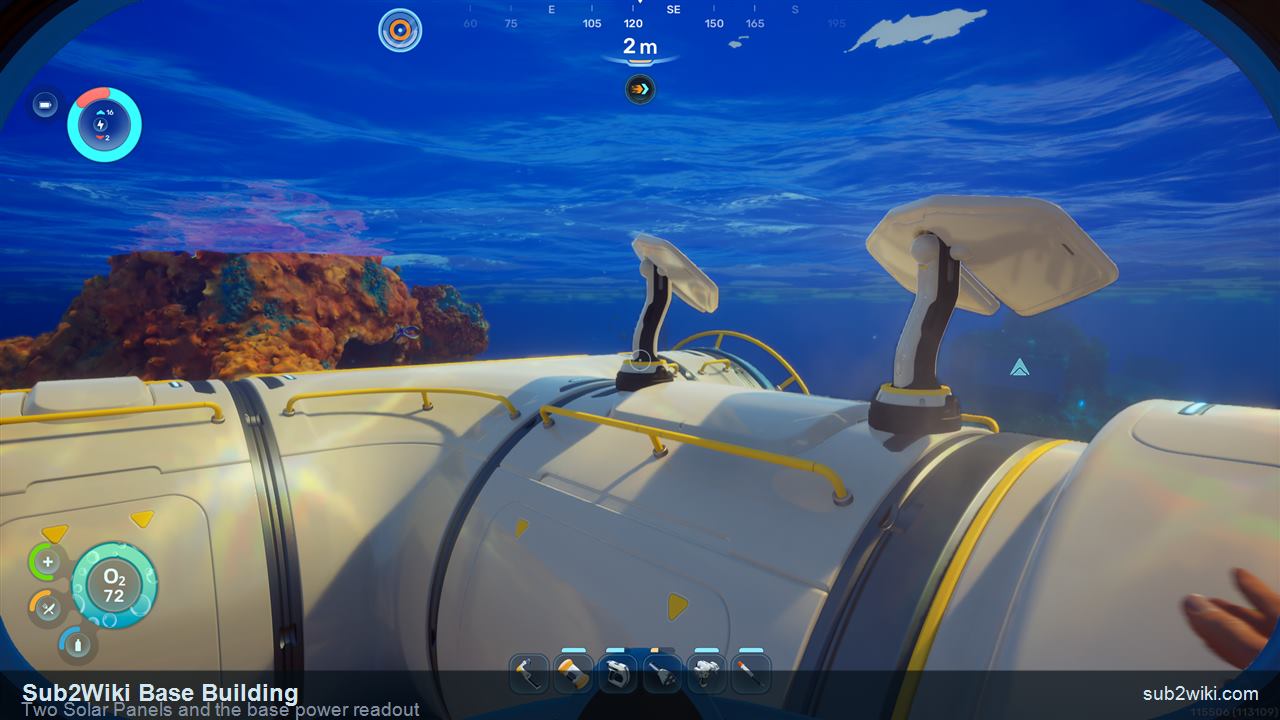
Solar Panel output is dynamic: 1-8 energy/sec depending on time of day and depth.
Step 7
Add a Solar Panel for power
At the start, the Solar Panel is your only power source, built from Titanium and Quartz under Exterior Facilities. Its output is dynamic, listed as 1-8 energy/sec: it produces up to 8 in bright daylight and drops toward 1 at night. The in-game text also warns output is reduced in deep water, which is a second reason to keep the first base shallow.
Two panels read 16 generation against a 2 baseline draw in the top-left HUD.
Step 8
Watch the base power readout
After building two Solar Panels, the top-left HUD shows base power: total generation on top, total consumption below. Two panels read 16 generation against a 2 baseline draw. Every base costs at least 2 to run. Keep generation above consumption at all times: if it drops below, every system stops, including oxygen production.
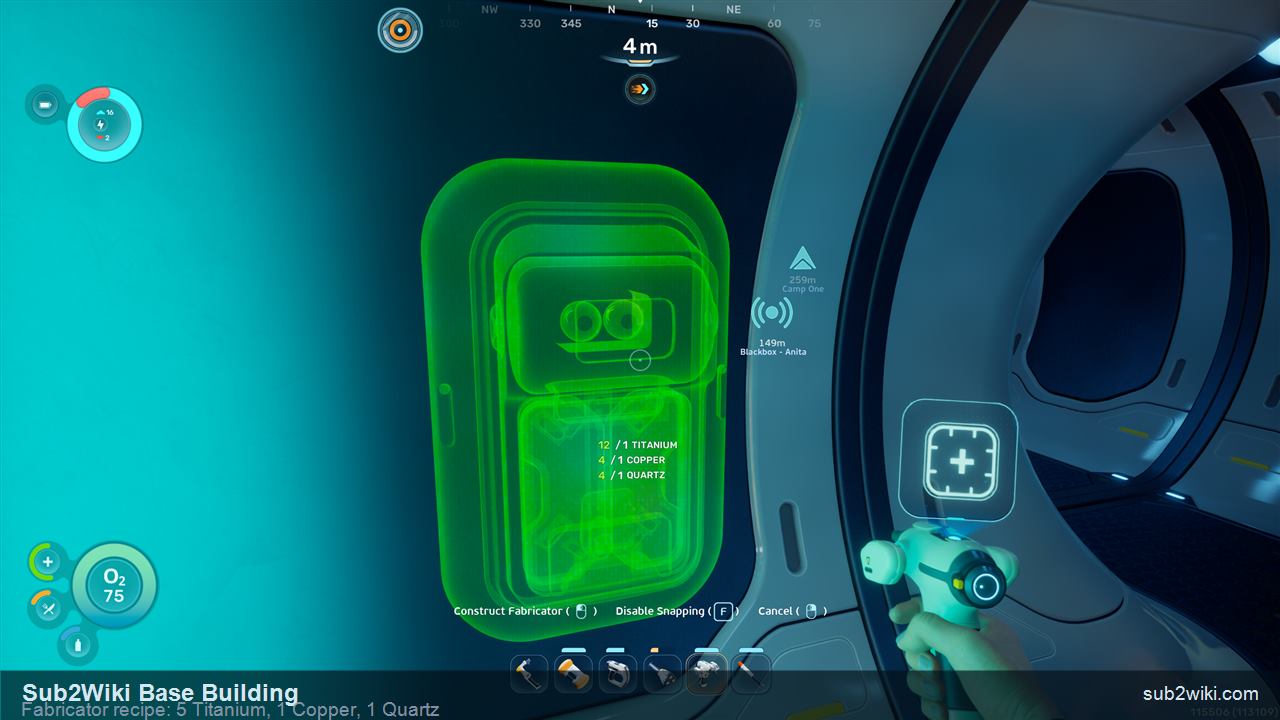
The Fabricator costs 5 Titanium, 1 Copper, and 1 Quartz.
Step 9
Build a Fabricator first
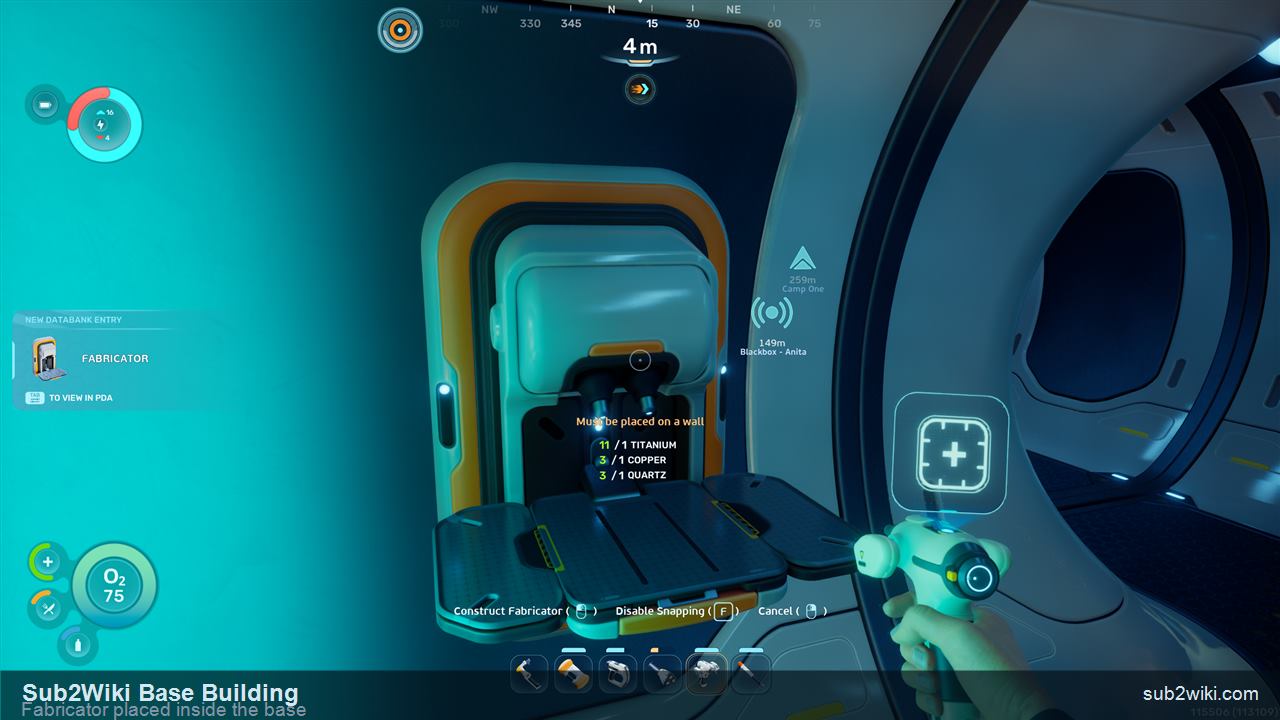
Inside the base, build a Fabricator first. The Lifepod Fabricator is damaged and cannot make higher-tier items, so your own working Fabricator unlocks proper crafting. It costs 5 Titanium, 1 Copper, and 1 Quartz, and is found under Interior Facilities.
A working Fabricator in your own base replaces the broken Lifepod unit.
Step 10
Fabricator placed and working
With the Fabricator placed and powered, you finally have full crafting at home. This is the single most useful interior piece in a first base, so prioritise it before decoration or extra storage.
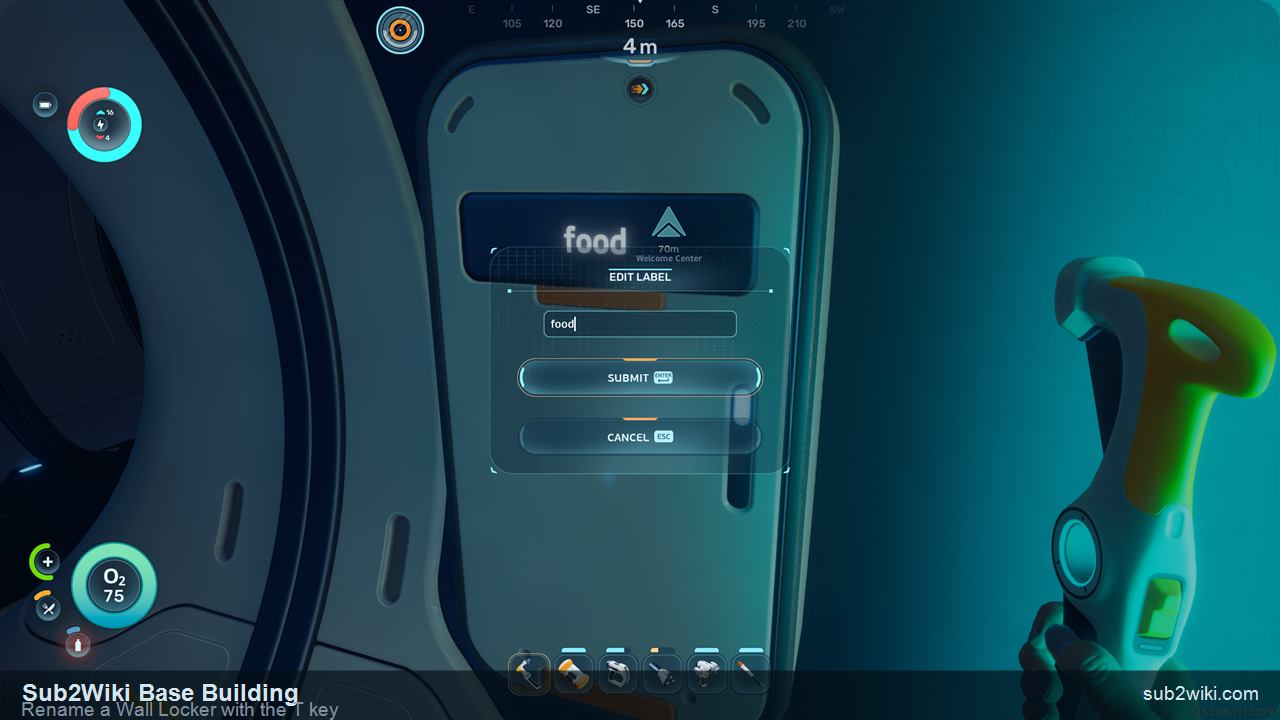
Press T to rename a locker. Label the entrance one "food" for quick access.
Step 11
Add a Wall Locker for food
Put a Wall Locker near the entrance for food. Press T to edit its label so it is easy to find later. A dedicated food locker by the Hatch means you can grab a meal on the way out without digging through ore storage.
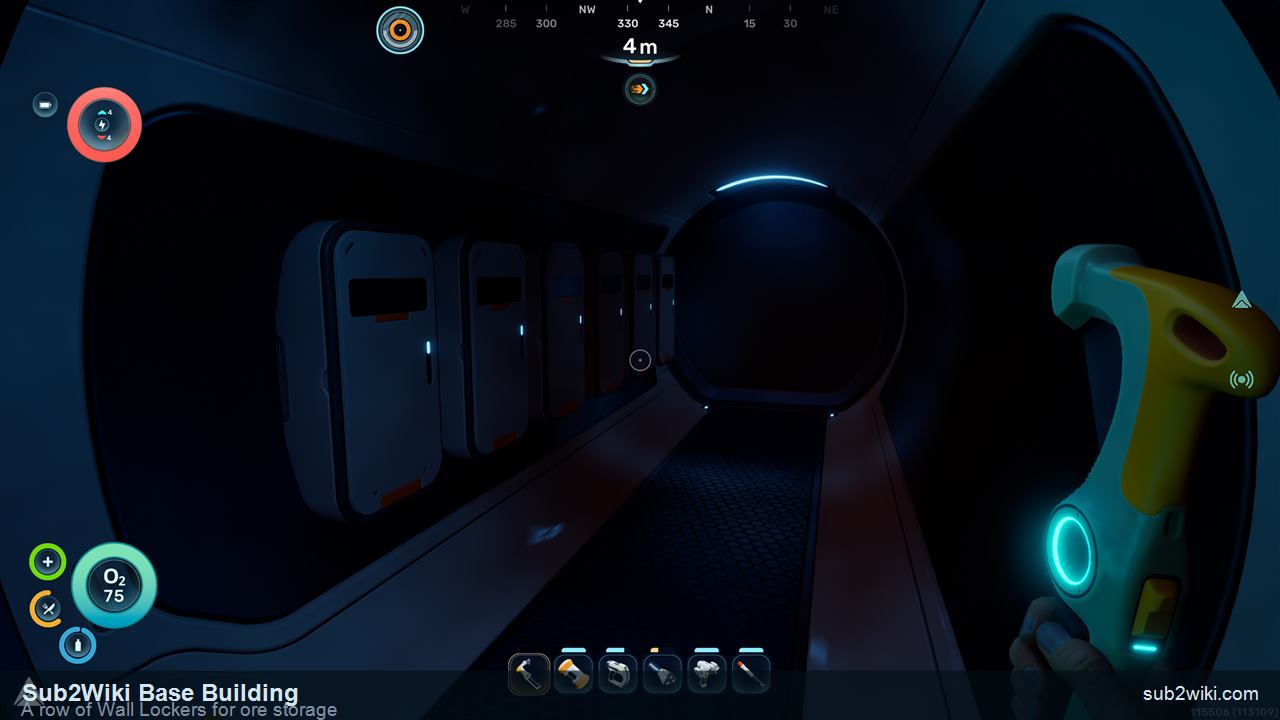
A row of labelled lockers turns the corridor into a sorting bay.
Step 12
Build a storage wall for ore
Line a corridor with Wall Lockers for ore and crafting materials, then move everything out of the Lifepod into the base. Labelling each locker by resource type keeps the home loop fast once you start gathering in bulk.
Power: the one rule that breaks bases
Power is the part new players get wrong. The base power readout in the top-left of the HUD shows total generation over total consumption. Keep generation on top and everything runs; let it fall behind and the whole base, oxygen included, shuts down.
⚡Every base costs at least 2 power just to exist, even empty.
⚡The top-left HUD shows total generation over total consumption.
⚡Generation must stay above consumption at all times.
⚡If power drops below demand, every system stops, including oxygen.
⚡Solar Panels peak at 8/sec in daylight and fall toward 1/sec at night.
⚡Solar output also drops in deep water, so keep the first base shallow.
First-base recipe table
Everything you place in this walkthrough, where to find it in the menu, and what it costs.
Piece
Cost
Menu tab
Note
Corridor
Titanium
Standard Elements
The base spine. Extend it, rotate with the mouse wheel, shrink with F.
Hatch
Titanium + Quartz
Standard Elements
Entry and exit point. Required before you can enter the base.
Solar Panel
Titanium + Quartz
Exterior Facilities
First power source. 1-8 energy/sec, reduced at night and in deep water.
Fabricator
5 Titanium + 1 Copper + 1 Quartz
Interior Facilities
Replaces the broken Lifepod Fabricator. Build it first inside the base.
Wall Locker
Default piece
Interior Facilities
Storage. Press T to rename. Use one for food, a row for ore.
Habitat Beacon
Default piece
Exterior Facilities
Marks the base on the map. Skip it if you build beside the Lifepod beacon.
Recipes reflect a hands-on Early Access build. Exact quantities for default pieces can shift between patches; re-check in your current build.
Common mistakes
Building too far from the Lifepod
A distant first base wastes the free oxygen, storage, Titanium, and beacon the Lifepod already gives you.
Forgetting the Hatch
Corridors alone stay sealed. Without a Hatch you cannot get inside your own base.
Underbuilding power
One Solar Panel plus the 2-power baseline leaves no margin at night. Build a second panel before adding interior systems.
Building deep on solar
Solar output drops in deep water. A deep first base on Solar Panels will brown out fast.
Skipping the Fabricator
The Lifepod Fabricator is damaged. Without your own, you cannot craft higher-tier gear at home.
Unlabelled storage
A wall of identical lockers is slow to use. Press T to label food and ore lockers as you build them.
Moving or deleting a base
Put the first base in the wrong spot? Use the Base Refunds option to remove a whole base and recover its materials, instead of deconstructing every corridor by hand. Use normal Habitat Builder deconstruction for single pieces.
Subnautica 2 Base Building FAQ
How do I start building a base in Subnautica 2?
Equip the Habitat Builder on hotkey 5, right-click to open its build menu, and place a Corridor. Green means the spot is buildable, red means it is blocked. Add a Hatch to get inside, then a Solar Panel for power.
Where should I build my first base?
Right next to the Lifepod, in shallow water. You can pull Titanium from the Lifepod, keep its free oxygen and storage, and reuse its beacon. Shallow water also keeps Solar Panel output high.
Why can I only build corridors at first?
Rooms are unlocked later. Early on the Habitat Builder only offers Corridors, plus the Hatch and Window, under Standard Elements. A corridor-only starter base is normal.
How does base power work in Subnautica 2?
The top-left HUD shows total generation over total consumption. Every base costs at least 2 power. Generation must stay above consumption, or every system, including oxygen, stops working.
How much power does a Solar Panel make?
It is dynamic: 1 to 8 energy per second. Solar Panels produce up to 8 in bright daylight and drop toward 1 at night. Output is also reduced in deep water, so shallow bases get the most from solar.
What should I build first inside the base?
A Fabricator. The Lifepod Fabricator is damaged and cannot craft higher-tier items, so your own Fabricator (5 Titanium, 1 Copper, 1 Quartz) restores full crafting at home.
How do I rename storage lockers?
Look at a Wall Locker and press T to edit its label. Name one "food" near the Hatch, then label a row of lockers by resource type for ore and crafting materials.